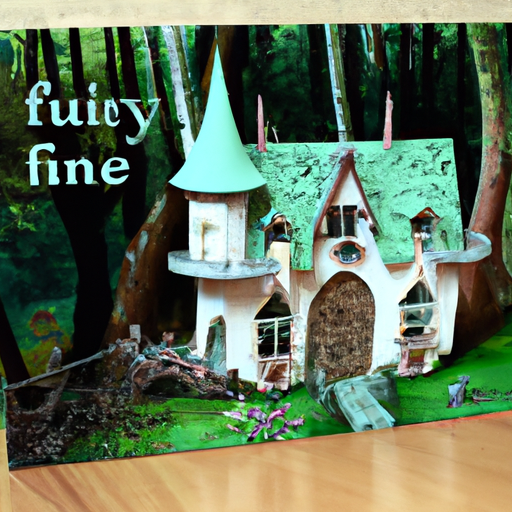
Choosing a Fairy House Kit
Considering the size and materials
When it comes to choosing a fairy house kit, there are a few important factors to consider. First, you’ll want to think about the size of the kit. Do you have a large garden or a small flower bed? Determining the scale of your project will help you select the perfect-sized fairy house. Additionally, take into account the materials of the kit. Are you looking for a wooden house that will blend in seamlessly with nature, or would you prefer a colorful, whimsical ceramic house? Each material option can lend a different feel to your fairy garden, so choose one that matches your personal style and vision.
Exploring different kit options
There are numerous fairy house kit options available, so it’s essential to explore different kits and find one that suits your preferences. Some kits come with just the basics, while others include additional accessories like fairy figurines or tiny furniture. Consider what elements are important to you, whether it’s a simple and rustic fairy house or a kit that provides a complete fairy world for your garden.
Reading product reviews
Before purchasing a fairy house kit, take some time to read product reviews from other buyers. This will give you valuable insights into the quality, durability, and overall satisfaction of the kit. Look for reviews that provide detailed information about the assembly process, the materials used, and any additional tips or tricks from experienced fairy garden enthusiasts. By doing this research, you can ensure that you choose a kit that meets your expectations and brings joy to your outdoor space.
Remember, creating a fairy house is a delightful and creative project that allows you to bring a touch of magic to your garden. By carefully considering the size and materials of your kit, exploring different options, and reading product reviews, you’ll be well on your way to building a beautiful and enchanting fairy house that will surely make your garden come alive.
Preparing for Construction
Gathering necessary tools and materials
Before starting the construction of your fairy house, it’s essential to gather all the necessary tools and materials. In this step, you will need a hot glue gun, scissors, craft paint, paintbrushes, craft foam, craft sticks, and various decorative materials such as moss, beads, buttons, and tiny flowers. Make sure you have everything within reach, as it will save you time and effort during the construction process.
Setting up a workspace
Creating a dedicated workspace for your fairy house project is crucial for a smooth construction process. Find a flat surface where you can spread out all your materials and tools. It could be a table, a desk, or even an outdoor workstation if weather permits. Ensure that the area is well-lit, as it will help you navigate through the various steps of the construction process easily.
Reviewing the instruction manual
The instruction manual that accompanies your fairy house kit is your guide throughout the construction process. Take the time to carefully review each step and understand how the pieces fit together. Familiarize yourself with any specific techniques or tips mentioned in the manual, as they will help you achieve the best results. By thoroughly understanding the instructions, you’ll be able to proceed confidently and avoid any potential mistakes.
Now that you have gathered your tools and materials, prepared your workspace, and reviewed the instruction manual, you’re ready to dive into the construction process of your fairy house. Follow the subsequent steps carefully, and embrace your creativity as you bring your magical vision to life!
Assembling the Base Structure
Identifying and organizing kit components
When starting on your fairy house project, it’s important to begin by identifying and organizing all the components included in your kit. Lay them out in front of you and take a moment to familiarize yourself with each piece. This will make the assembly process much smoother and more enjoyable.
Building the foundation and walls
To create a sturdy base for your fairy house, start by connecting the larger, flat pieces together. These will form the foundation and walls of your magical abode. Follow the instructions provided in your kit to ensure a secure and stable structure. The walls should fit snugly into the slots or connectors provided, ensuring that the house will be able to withstand the elements.
Attaching doorways and windows
Once the foundation and walls are in place, it’s time to add the charming details that give your fairy house character. Attach the doorways and windows using the adhesive or other attachment method specified in your kit. Take your time and be precise in aligning these elements to ensure a seamless and aesthetically pleasing finish.
By following these step-by-step instructions, you will successfully assemble the base structure of your fairy house kit. With a little patience and attention to detail, you will soon have a whimsical and enchanting fairy house ready for your tiny, magical visitors. Happy building!

Adding Personal Touches
One of the best aspects of creating a fairy house using a step-by-step kit is the opportunity to add your own personal touches. This allows you to customize your fairy house and make it truly unique. In this section, I will guide you through a few ways to add personal touches to your fairy house.
Creating a roof using provided materials
The first step in adding personal touches is to create a roof for your fairy house. The kit will include all the necessary materials to make a roof, such as leaves, moss, or twigs. I recommend taking your time and arranging the materials in a way that is aesthetically pleasing to you. Experiment with different patterns and textures until you find the perfect arrangement.
Decorating the exterior with paints or markers
Once the roof is complete, you can move on to decorating the exterior of your fairy house. This is where you can really let your creativity shine. Feel free to use paints or markers to add color and designs to the walls of the house. You can create intricate patterns, simple motifs, or even write a message for the fairies. The choice is yours!
Enhancing the design with miniature furniture and accessories
To further personalize your fairy house, consider adding miniature furniture and accessories. The kit may include tiny chairs, tables, or even a tiny fairy figurine. You can also find additional accessories at craft stores or online. These small details can really bring your fairy house to life and create a magical atmosphere for the fairies.
By following these steps and adding your personal touches, your fairy house will become a whimsical and enchanting haven for the fairies. Let your imagination run wild and create a truly special fairy house!
Lighting and Wiring
Understanding basic electrical wiring
When it comes to creating a magical fairy house, lighting plays a crucial role in bringing your miniature world to life. Understanding basic electrical wiring is essential to ensure the safe and successful installation of lights in your fairy house. It may seem intimidating at first, but with the right guidance, anyone can master this skill.
Selecting and installing LED lights
LED lights are the perfect choice for illuminating your fairy house. They are energy-efficient, long-lasting, and emit a soft, enchanting glow. Begin by selecting the appropriate LED lights for your project, considering factors such as size, color, and style. When it comes to installation, follow the step-by-step instructions provided in the kit. Remember to handle the lights with care and avoid creating any potential hazards.
Hiding wiring for a neater appearance
To ensure your fairy house looks enchanting from every angle, it’s important to hide the wiring for a neater appearance. Start by planning the placement of your lights, considering how they will be hidden within the structure. Incorporate small nooks, pathways, or handmade furniture to cleverly disguise the wiring. This attention to detail will add an extra touch of magic to your fairy house.
With these step-by-step instructions, you’ll be able to master the lighting and wiring of your fairy house kit. By understanding the basics of electrical wiring, selecting the right LED lights, and creatively hiding the wiring, you can create a truly enchanting miniature world that will captivate the imagination of all who see it. Let your creativity shine as you bring your fairy house to life!
Landscaping and Outdoor Features
One of the most exciting aspects of creating a fairy house is designing the perfect miniature garden landscape. This is where you can let your creativity soar as you create a magical environment for your fairy friends to enjoy. In this section, I will guide you through the steps of designing your landscape, adding pathways, plants, and flowers, and incorporating natural elements to bring your fairy house to life.
Designing a miniature garden landscape
Start by envisioning the layout of your fairy house’s outdoor space. Will it feature rolling hills, a babbling brook, or perhaps a cozy garden nook? Take into consideration the size of your fairy house and the space you have available. Once you have a general idea, begin arranging the elements accordingly.
Adding pathways, plants, and flowers
Next, it’s time to bring in the finishing touches that make your miniature garden truly enchanting. Lay out a winding pathway leading up to the fairy house, using small pebbles or gravel to create a realistic look. Then, carefully select miniature plants and flowers to add color and beauty to the landscape. Choose fairy-friendly varieties that thrive in small spaces, such as moss, succulents, and tiny blossoms.
Incorporating natural elements like pebbles and twigs
To make your fairy house blend seamlessly with its natural surroundings, incorporate natural elements such as pebbles, twigs, and pinecones. These can be used to create rustic furniture, fences, or even a cozy fire pit. Let your imagination run wild and use these materials to add intricacy and charm to your fairy house.
Now that you have learned how to design a miniature garden landscape, add pathways, plants, and flowers, and incorporate natural elements, it’s time to step back and admire your work. Your fairy house is now complete, ready to welcome its magical inhabitants into their new home. Enjoy the whimsy and enchantment of your very own fairy paradise!
Finishing Touches
After completing the main structure of your fairy house using the step-by-step instructions provided in the kit, it’s time to add the finishing touches to bring your miniature wonderland to life. These final steps will not only ensure the longevity and durability of your fairy house but also add delightful details and decorative touches that will make it truly enchanting.
Applying a protective sealant or varnish
To protect your fairy house from the elements and preserve its charm for years to come, it’s recommended to apply a protective sealant or varnish. This will help seal the wood and protect it from moisture, UV rays, and other outdoor elements. Choose a non-toxic sealant that is safe for both the environment and the fairies that may inhabit your creation. Apply the sealant evenly and allow it to dry according to the manufacturer’s instructions.
Adding final details and decorative touches
Now comes the fun part! Use your imagination and creativity to add those final magical touches to your fairy house. You can embellish it with moss, shells, stones, tiny flowers, or even miniature furniture and accessories. Let your personal style shine through as you create a cozy and inviting space for fairies to visit.
Ensuring structural stability
Before placing your fairy house in its final location, double-check its structural stability. Make sure all the pieces are firmly attached and there are no loose or wobbly parts. If needed, reinforce any weak spots with extra glue or screws. This will ensure that your fairy house stands strong and withstands the test of time.
With these finishing touches, your fairy house is now complete and ready to be nestled in your garden or displayed indoors. Embrace the magic and wonder that comes with creating your own enchanting fairy world!
Maintenance and Care
Cleaning and dusting the fairy house
One important aspect of maintaining your fairy house is keeping it clean and free from dust. Over time, dust can accumulate on the delicate surfaces of the house and its accessories, dulling their beauty and potentially attracting pests. To clean your fairy house, gently wipe the surfaces with a soft, dry cloth or a feather duster. Avoid using any harsh chemicals or abrasive materials as they may damage the intricate details and colors of the house. Regularly dusting your fairy house will help preserve its charm and ensure it remains a magical haven for the fairies.
Repairing any damages or wear
Occasionally, your beloved fairy house may experience some wear and tear due to its exposure to the elements or playful interactions with curious little hands. Should you notice any damages, such as loose pieces or peeling paint, it is important to address them promptly to prevent further deterioration. Use a clear adhesive suitable for the materials the house is made of to reattach any loose components. For minor paint touch-ups, carefully match the colors and apply a thin layer with a small brush. Taking the time to repair and maintain your fairy house will ensure its longevity and keep the enchantment alive.
Storing the kit and accessories properly
When the time comes to store your fairy house kit and accessories, it is essential to do so in a way that protects them from damage and preserves their quality. Find a cool, dry place away from direct sunlight and extreme temperatures, as these factors can cause fading and warping. Store the kit in a sturdy box or container to protect it from dust and potential breakage. Keep smaller accessories and delicate pieces in separate compartments or small bags to prevent loss or damage. By storing your fairy house kit and accessories properly, you can enjoy their magic for years to come.
Displaying the Fairy House
One of the most exciting parts of creating a fairy house is finding the perfect spot to display it. With careful consideration and a touch of creativity, you can bring your fairy house to life in a way that truly showcases its magical charm. Here are some tips on how to display your fairy house effectively.
Choosing an appropriate location
When choosing a location for your fairy house, it’s important to consider both practicality and aesthetics. Look for an area that is visible but protected from the elements, such as a sheltered garden nook or a covered patio. You may also want to take into account the natural surroundings, such as placing your fairy house near flowers or placing it at the base of a tree to enhance the enchanted atmosphere.
Creating a miniature display area
To make your fairy house stand out, consider creating a miniature display area around it. This can include carefully arranged rocks and pebbles, small plants, or even a tiny pathway leading up to the house. Use your imagination to create a whimsical setting that captures the essence of the fairy world.
Showcasing the fairy house with other fairy art or accessories
For a truly enchanting display, consider showcasing your fairy house alongside other fairy art or accessories. This could include miniature fairy figurines, tiny fairy doors, or even fairy lights. By incorporating these elements, you can create a captivating scene that invites viewers to immerse themselves in the magical world of fairies.
With the perfect location, a miniature display area, and the right accessories, your fairy house will become a captivating centerpiece in any space. Let your imagination soar and create a display that brings the enchantment of the fairy world to life.
Share Your Creation
Creating a whimsical fairy house with the help of a step-by-step fairy house kit is an enchanting and rewarding experience. Once you have completed your magical masterpiece, you might be wondering how to share it with others. There are several ways you can showcase your finished fairy house and inspire fellow fairy enthusiasts.
Photographing and documenting your finished fairy house
Capturing the beauty and intricacy of your fairy house through photography is a wonderful way to preserve your creation and share it with others. Find a suitable backdrop that complements the fairy house, such as a lush garden or a woodland setting. Experiment with different angles and lighting to bring out the unique details. Consider capturing close-up shots of the delightful miniature accessories and furniture that bring your fairy house to life. Documenting your creative process and adding captions to your photos will provide viewers with a glimpse into your imaginative journey.
Sharing on social media or online communities
Social media platforms and online communities provide excellent platforms for showcasing your fairy house and connecting with fellow fairy enthusiasts. Post your photos on platforms like Instagram or Facebook, using relevant hashtags to increase visibility. Join online communities dedicated to miniature art and fairy houses, where you can share your creations, receive feedback, and find inspiration for future projects.
Inspiring others with your creativity
Your fairy house is a reflection of your creativity and imagination. By sharing your creation, you have the opportunity to inspire others to embark on their fairy house journey. Write blog posts or create step-by-step tutorials detailing your process, offering helpful tips and tricks along the way. Encourage others to explore their own creativity by experimenting with different materials, colors, and design elements. Showcasing your fairy house and sharing your experiences will undoubtedly ignite the spark of inspiration in others.
Let your fairy house be a source of joy and inspiration, inviting others into a world of magic and wonder. By photographing, sharing on social media, and inspiring others with your creativity, you are contributing to the delightful community of fairy house enthusiasts around the world. So go ahead, share your creation and watch as the magic spreads!
Creating a Magical Story
Developing a backstory for your fairy house
As a lover of all things magical and enchanting, I have always been fascinated by the world of fairies and their whimsical dwellings. That’s why I was thrilled when I discovered fairy house kits, which allow me to create my very own miniature fairy art.
One of my favorite aspects of these kits is the opportunity to develop a unique backstory for my fairy house. I find that by imagining who my fairy residents are and what kind of adventures they embark on, I can truly bring my fairy house to life. Whether it’s a mischievous sprite or a wise elder, giving my fairies personalities adds an extra layer of enchantment to the project.
Incorporating elements of fantasy and imagination
The best part about fairy house kits is the ability to let your imagination run wild! I love incorporating elements of fantasy and magic into my fairy houses. From tiny mushrooms sprouting near the front door to miniature toadstools scattered throughout the garden, these decorative touches transport me to a world where anything is possible.
Engaging in imaginative play with your fairy house
Once I have completed my fairy house, I can’t help but engage in imaginative play. I like to pretend that I am a resident of the house, embarking on daring quests and magical adventures. It’s incredible how a simple creation can ignite such a sense of wonder and fantasy within me.
Creating a fairy house using a kit is a delightful way to express creativity and indulge in imaginative play. By developing a unique backstory, incorporating elements of fantasy, and engaging in pretend play, my fairy house becomes a truly magical experience.
Benefits of Building Fairy Houses
Encouraging creativity and artistic expression
Building fairy houses not only allows individuals to tap into their creative side but also provides an outlet for artistic expression. With a step-by-step fairy house kit, I can let my imagination roam free and create a unique dwelling for magical creatures. From selecting the perfect materials to designing intricate details, the process allows me to express my creativity and bring my own vision to life.
Promoting relaxation and stress relief
Engaging in the construction of a fairy house can be a soothing and relaxing activity. It allows me to escape the demands of daily life and immerse myself in a tranquil world where tiny fairy folk reside. With each delicate touch and careful arrangement, I find myself unwinding and letting go of the stresses that weigh me down. This mindful practice offers a much-needed respite and brings a sense of calmness and peace.
Providing a unique bonding activity for families
Building fairy houses becomes more than just a solitary endeavor when shared with loved ones. It presents a wonderful opportunity for families to come together, unleash their creativity, and enjoy quality time. As we work together, our bond grows stronger, and memories are created. Whether it’s parents and children or siblings, building fairy houses cultivates a sense of unity and fosters a deeper connection with one another.
The step-by-step fairy house kit instructions benefit individuals by nurturing creativity and serving as a means of artistic expression. Additionally, this activity promotes relaxation and offers stress relief. Moreover, it provides families with a unique opportunity to bond and create cherished memories together.
Fairy House Kit Safety
Understanding age restrictions and supervision
When it comes to working with fairy house kits, safety should always be a priority. Before diving into this enchanting project, it is crucial to understand any age restrictions that may be associated with the kit. Different kits may have specific age recommendations due to the level of complexity or the use of small parts. It is essential to adhere to these guidelines to ensure a safe and enjoyable experience.
In addition to age restrictions, proper supervision is key, especially when younger children are involved. Having an adult oversee the project can help prevent accidents and ensure that the instructions are followed correctly. As a responsible adult, I always make sure to provide guidance and assistance whenever needed.
Ensuring proper handling of tools and materials
Working with fairy house kits often involves various tools and materials. It is crucial to use these items properly to minimize the risk of injury. As I embark on this whimsical journey, I ensure that I handle the tools with care and follow the instructions provided. By doing so, I can create a beautiful fairy house while keeping myself safe.
Being aware of potential choking hazards
Fairy house kits often include small parts that could pose a choking hazard, especially for young children. As I unbox the kit, I make sure to double-check for any loose parts and keep them out of reach from little ones. Safety should always come first, and by remaining vigilant, I can create a magical fairy house without compromising anyone’s well-being.
Remember, by understanding age restrictions, employing proper handling techniques, and being mindful of potential choking hazards, we can enjoy the creation of fairy houses while ensuring a safe and pleasant experience for everyone involved. So let’s dive into our fairy house kit and let our imagination take flight!
Conclusion
After following the step-by-step fairy house kit instructions, I have arrived at the end of a creative journey that has brought me immense joy and satisfaction. Reflecting on the process, I have realized that not only did I construct a charming fairy house, but I also honed my artistic skills and discovered the hidden magic within me.
Reflecting on the creative journey
Throughout the construction process, I learned the importance of patience and attention to detail. Each step introduced new techniques and challenges, allowing me to grow as an artist. From shaping the miniature furniture to painting delicate flowers on the walls, I immersed myself in a world of fantasy and creativity.
Furthermore, this hands-on project provided a much-needed escape from the hustle and bustle of everyday life. Spending time meticulously arranging the tiny décor and imagining the fairies who would call this house their home brought a sense of tranquility and calm.
Enjoying the beauty and magic of your completed fairy house
Now that my fairy house is complete, I can proudly display it in my garden or on a shelf, adding a touch of whimsy to my surroundings. Its intricate details and vibrant colors never fail to catch the eye and ignite conversations with visitors.
Every time I glance at my finished creation, I am reminded of the joy and fulfillment that comes from engaging in a creative endeavor. The fairy house serves as a reminder to embrace my imagination, explore new avenues of expression, and find beauty in even the smallest details.
In conclusion, the step-by-step fairy house kit instructions have guided me through an enchanting journey of self-discovery and creativity. I encourage you to embark on this magical adventure and revel in the beauty and wonder that awaits.